Pedestal API, ClojureScript SPA and Google Authentication
Securing a Pedestal served ClojureScript SPA using Google authentication.
Introduction
The following are some notes about a repository containing working code (extracted from a larger project) demonstrating a combination of a secured Pedestal website (and associated API services), and a React-ive ClojureScript front-end application that utilizes either Google or bespoke login logic to identify and validate the user’s credentials, and sets his/her authorization levels.
I hope that it may be helpful to anyone else who may know how each of the the individual pieces work, but is wondering how to put it all together.
I owe a debt of gratitude to Tristan Straub, as much of the front-end logic (and code) to utilize Google’s login is based on some code he posted on Github. I’ve changed the code in many ways, so any errors are not his but mine.
The front-end application, which is intentionally simple, allows a user to login, and according to his/her permissions will allow access to various resources. The application is written using React/ReFrame, Semantic UI React and ClojureScript. The application uses Figwheel-main to compile and, in development mode run the front-end; but switching to a different tool-chain (e.g. shadow-cljs) should be relatively easy.
Features
Google Login Integration (and mapping to application id)
The application demonstrates how to integrate Google’s login functionality with a ClojureScript application. After successfully authenticating with Google, the user’s Google email address is associated with one (and only one) internal application user ID. The internal user ID is associated internally with one or more application defined roles, which are defined in the code.
Conceivably, this mapping of external ID to internal ID could allow
multiple external authentication services to be used to map multiple
externally asserted identities to a single internal user ID. For
example, by extending the application to use Facebook’s authentication
service, it would be possible to have both user@gmail.com and
user@facebook.com to be mapped to the same internal user ID, e.g.
:user.
Fundamentally, authenticating and logging in merely associates a user with a web session. The session is the operative object and identities are not, and cannot be shared between sessions. A user may have multiple sessions open, but they don’t “mingle”.
Ad-hoc affirmative login method
The application as presented allows a user to simply assert that they are a known user. The only reason this feature is included is to simplify debugging. In a production application these assertions would typically be replaced with an application specific logon process.
Isolation of sensitive information from codebase
In order to run Pedestal/Jetty (for production) or Figwheel/Jetty (for development) with https (required to use Google login) the location of a keystore and its password must be supplied.
This is an obvious security concern - including any sensitive information in either the source-code, or the application’s generated js code is poor security hygiene. The application avoids this by using environment variable (assumed to be available) to store this information which is read-only at runtime.
Secured API end-points by role membership
The application uses role-based security, where access to resources (URI’s) is permitted or prohibited according to whether a user has membership within a particular role. A user ID can be associated with one or more roles. Roles are independent of one another. There is no concept of hierarchy or inheritance beyond how the code chooses to handle these concepts.
The application, for our purposes, defines three roles: :admin,
:user and :public. An unauthenticated user is associated with the
role :public. Note that there is nothing privileged about these roles,
or their names. They are completely application defined.
In the code for the application’s configuration file
(common-src/config/config.cljc) you can see how these have been
defined:
(def roles-and-users
  {:admin {:roles #{:admin}
           :users #{"admin@timpsongray.com" "heykieran@gmail.com"}}
   :user {:roles #{:user}
          :users #{"user@timpsongray.com"}}})
Here, we’ve defined two users :user and :admin, along with two
roles, also called :user and :admin. Users who authenticated with
the email addresses admin@timpsongray.com and heykieran@gmail.com
will be associated with the user ID :admin, and the user with the
email address user@timpsongray.com will be associated with the user ID
:user.
If we examine how routes are defined in the file
server/be_handler_pdstl.clj we can see how security is applied to
URL’s.
(def routes
  (route/expand-routes
    #{["/echo"  :get echo]
      ["/auth/isauthenticated" :post (build-secured-route-vec-to app-auth/get-current-logged-in-user) :route-name :alloc-public/is-authenticated]
      ["/auth/setid" :post (build-secured-route-vec-to app-auth/alloc-auth-explicitly-set-identity-of-user-post) :route-name :alloc-public/auth-set-id-post]
      ["/auth/google" :post (build-secured-route-vec-to app-auth/alloc-auth-google-login) :route-name :alloc-public/google-login-post]
      ["/auth/logout" :post (build-secured-route-vec-to disconnect-session) :route-name :alloc-user/auth-logout-post]
      ["/api/getsecresource/p" :post (build-secured-route-vec-to get-secured-resource) :route-name :alloc-public/test-res]
      ["/api/getsecresource/u" :post (build-secured-route-vec-to get-secured-resource) :route-name :alloc-user/test-res]
      ["/api/getsecresource/a" :post (build-secured-route-vec-to get-secured-resource) :route-name :test-res]
      ["/r/home" :get [content-neg-intc respond-with-app-page] :route-name :app-main-page]}))
The current implementation uses the namespace of values
of each route’s :route-name key to assign security.
Any protected URL whose :route-name namespace is :alloc-public is
available to any user, authenticated or not.
Any protected URL whose :route-name namespace is :alloc-user is
available to any user associated with the :user role.
Any protected URL whose :route-name namespace is either
:alloc-admin or the default namespace is available to only users
associated with the :admin role.
URL’s are only protected if they use the auth interceptors. These interceptors are included when the function
build-secured-route-vec-tois used to wrap the content handler function.
Another item to note is the three test URL’s /api/getsecresource/p
(available to all users), /api/getsecresource/u (available to users in
the :user role) and /api/getsecresource/a (available only to users
in the :admin role) use the same handler get-secured-resource.
Development Server & Production Server
The application has both a development mode and a production mode. Both
modes use Pedestal as the API server, responding to requests as defined
in the routes parameter used to start the server. The difference
between the two modes is in how the js files are served, and in how
front-end development proceeds, or not.
In development mode the application’s js files are served from a handler
(fe-src/server/fe-handler) sitting behind figwheel/Jetty, and started
using the script provided in scripts/server.clj. This facilitates the
standard figwheel development process of having figwheel monitor a set
of source directories and regenerate and reload any changed files as
necessary. This should be familiar to anyone who’s used figwheel-main
for ClojureScript development. An alias has been defined in the
deps.edn file to start all the various servers and to start figwheel.
In production mode, the js files are served from the Pedestal/Jetty
server itself. Of course, in order to do this the js files must have
been previously compiled by figwheel. An alias has been defined in the
deps.edn file for this purpose.
Log-out Functionality
The application allows the user to disassociate their session from their identity. Because the session is the operative object, this is essentially logging out.
Session Expiration
When credentials are issued for an authenticated user and associated with a session, the information will also contain an expiration date. If a user attempts to access a protected resource and the credentials are found to have expired, access is denied and the user’s credentials are disassociated from the session. This essentially logs that user out and he/she will need to reassociate their credentials with the session.
React/Reagent/Reframe/kee-frame Application
The test application is a reactive application written in ClojureScript using reagent, reframe and kee-frame. It illustrates some of the principles required for a simple application of this type.
Semantic UI Integration
The toolkit used for widgets and styling is SemanticUI-react, and the application illustrates how the library can be used.
Running the Servers & Applications
Setting up a keystore for HTTPS
In order to run the web servers in secured mode you’ll need to create a keystore for the certificates used by the servers and make it available to Jetty. Instructions on how to do this can be found here.
Setting up Google Login
In order to use the application for yourself you will need to get your own Google Client ID. Instructions on how to do this can be found here.
You will also need to use the Google Console to inform Google of the Authorized Javascript Origins associated with your Client ID. These should be the names and ports of your https endpoints. For testing, these will typically be the server name and port of your Pedestal/Jetty and your figwheel/Jetty (for development mode only) servers.
The values should also be set in the following places
In your environment the following variables should be set
| Environment Variable | Value |
|---|---|
ALLOC_KEYSTORE_PASSWORD |
The keystore’s password |
ALLOC_KEYSTORE_LOCATION |
The keystore’s filesystem location |
ALLOC_SSL_PORT |
The ssl port number used for Pedestal |
ALLOC_PORT |
The port number used for Pedestal |
In the common-src/config/config.cljc you will need to set the following
variables
| Configuration Variable | Value |
|---|---|
google-client-id |
your Google Client ID |
my-hostname |
your server’s name |
figwheel-ssl-port |
the port used by figwheel’s https server and serving the application’s js files |
pedestal-port |
Pedestal’s HTTP port number (should match ALLOC_PORT). |
pedestal-ssl-port |
Pedestal’s HTTPS port number (should match ALLOC_SSL_PORT) |
google-callback-url |
change the server name in this variable to match your server’s name. |
In the file dev.cljs.edn change the :open-url parameter to match your
server’s name, and the ssl port used by figwheel. This should match
https://<my-hostname>:<pedestal-ssl-port>/r/home.
Starting the Server(s)
Development Mode
-
In your IDE of choice, start a REPL (with the alias
:main) -
Load and execute the
controlnamespace -
Execute the function
(start-dev)(It’s within acommentexpression). -
Log messages are sent to the REPL output stream, so you can monitor progress and activity.
-
When the Pedestal server has started, run the following from a command line
clj -A:devThis will start the front-end server used by figwheel on ports 9500 and
figwheel-ssl-portand will start the figwheel watch process. -
Your browser should automatically open to
https://<my-hostname>:<figwheel-ssl-port>/r/homewhere the application will be loaded. (You should have set this indev.cljs.ednas above).
:cljs/quit command to stop the Figwheel build process followed by Ctrl+C to stop the front-end server itself.
Production Mode
Build the production application by running
clj -A:prod
from the command line. This will generate the production js files from your ClojureScript sources. Then, from the command line run
clj -A:main:main-output -m control
This will start the Pedestal server which in addition to serving API requests will also serve the js files built in the last step.
Finally, open your browser and navigate to https://<my-hostname>:8081/r/home to display the application’s Home page.
Navigating the Application
The Home Page
When the application first starts, you can go to the Home page

The Application’s Menu
The application is a SPA with client-side routing and has only a single menu with 5 menu items.
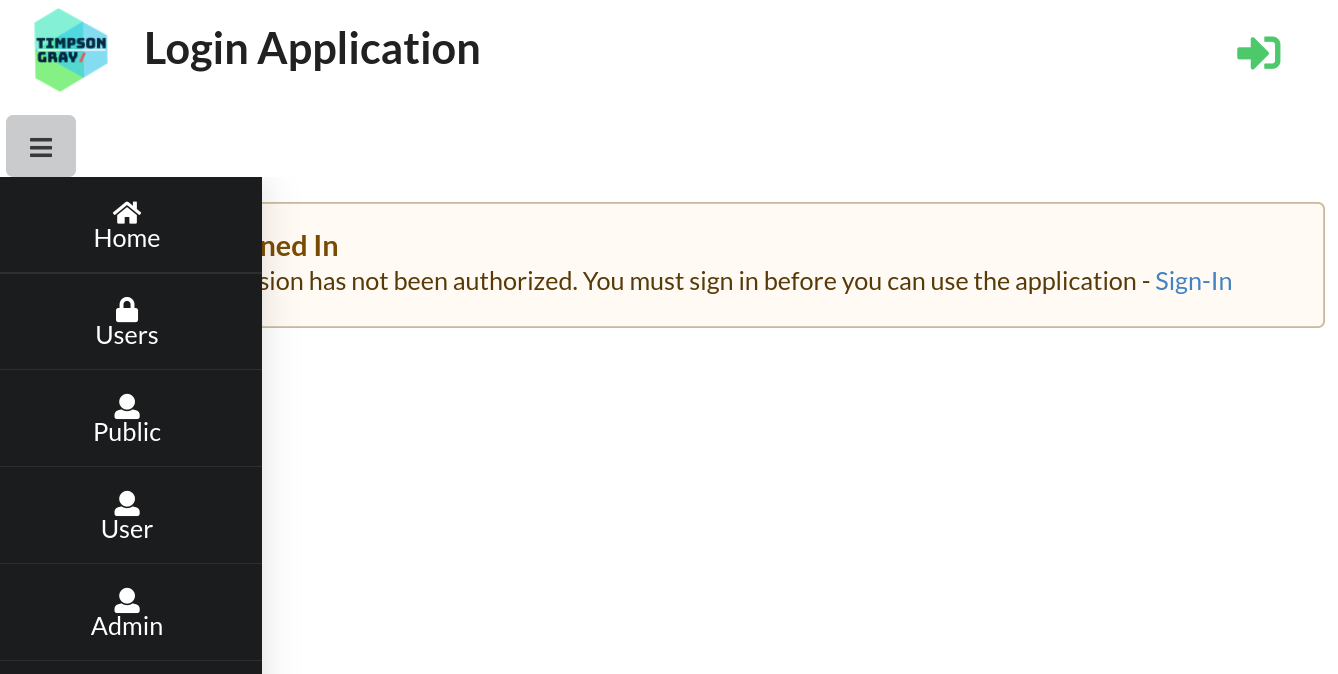
- The Home item will take you to the Home page
- The Users menu item will display the application’s Sign-In/Sign-Out page. Here you can connect an identity to your session (log-in), or disconnect an identity from your session (log-out).
- The Public menu item will request content from an unsecured API endpoint whose content is available to any user whether authenticated or not.
- The User menu item will request content from an an API endpoint to which access has been restricted to users with role memberships of
:adminor:user. - The Admin menu item will request content from an an API endpoint to which access has been restricted to users with role membership of
:admin.
Access a Public Resource
Even though you have not yet signed in, if you click on the Public menu item the application will respond with some content.

This is as expected as that resource is unsecured and available to anyone who can access the application.
Sign-In as the :local/:user User
On the Sign-In Page, click on the button labelled
user@timpsongray.com. This will associate you session with the application user :user, who has been assigned the :user role. This form of sign-in is a :local authority sign-in. The authority is granted by the application itself.
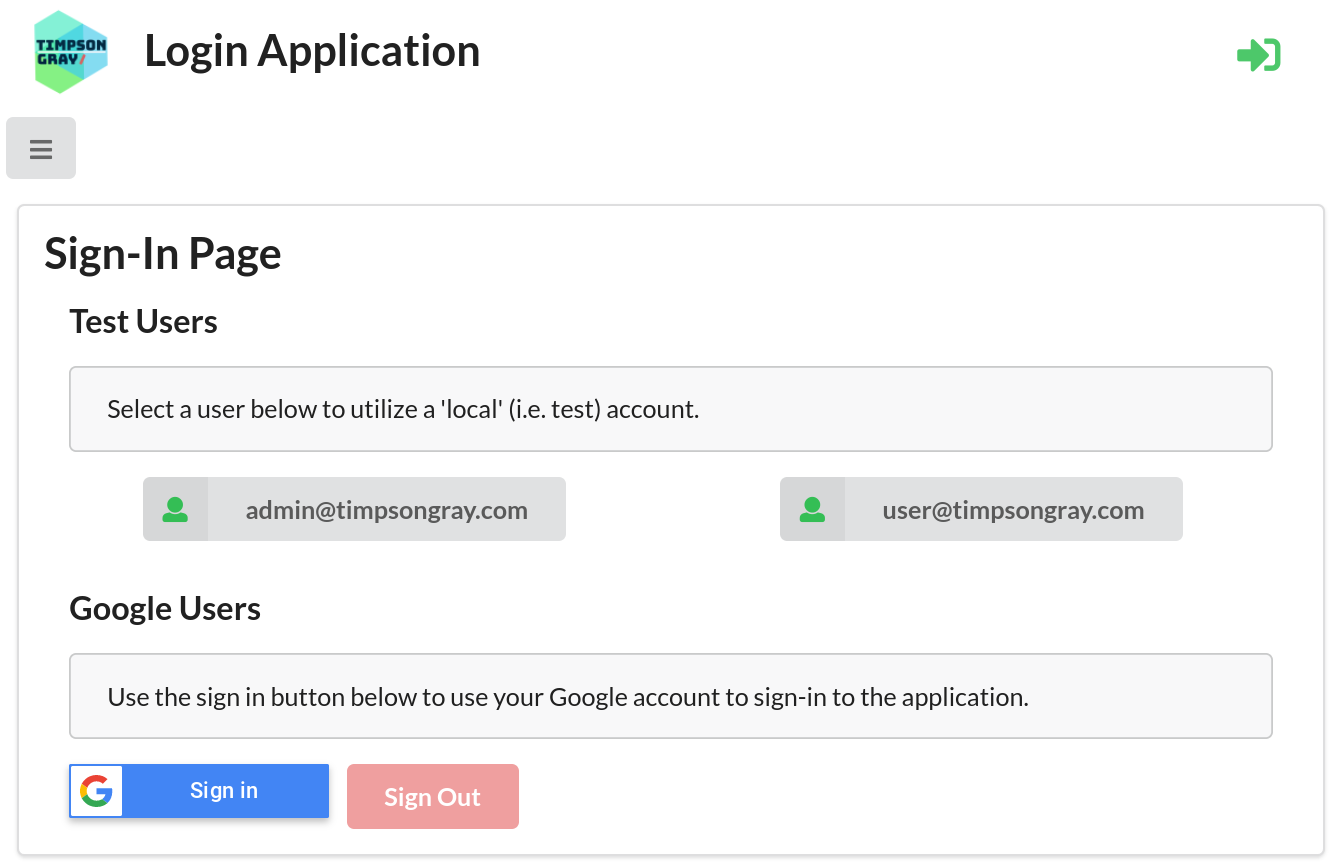
Once you’ve done that you’ll be redirected to the Home page where your session and identity details are displayed.

:user has signed in.
Accessing a protected resource
Now click on the User menu item. The application will attempt to fetch a resource from an API endpoint restricted to users in the :user or :admin roles.
Because :user has that role association the contents of the resource is displayed.

:user) is allowed to access to the User resource.
However, if you now click on the Admin menu item, which attempts to fetch
data from an API endpoint restricted to :admin role members only, you’ll see
an access denied message.
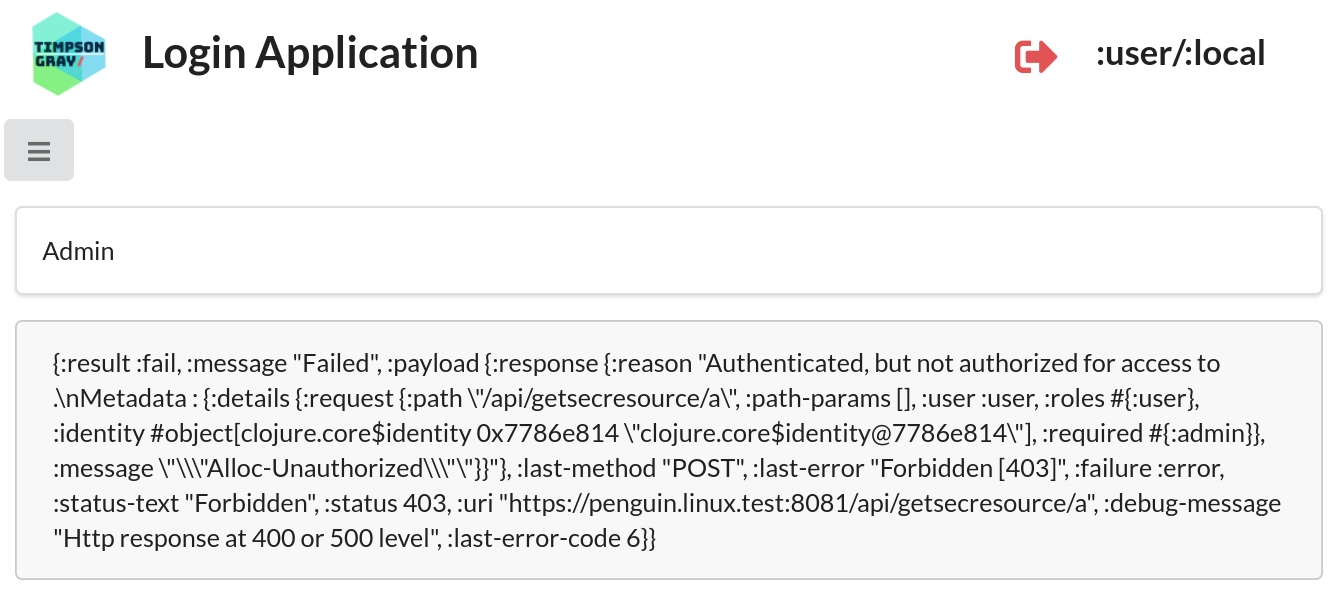
:user) is denied access to the Admin resource.
Sign-Out from :user
Click on the Users menu item to go to the Sign-In/Sign-Out page
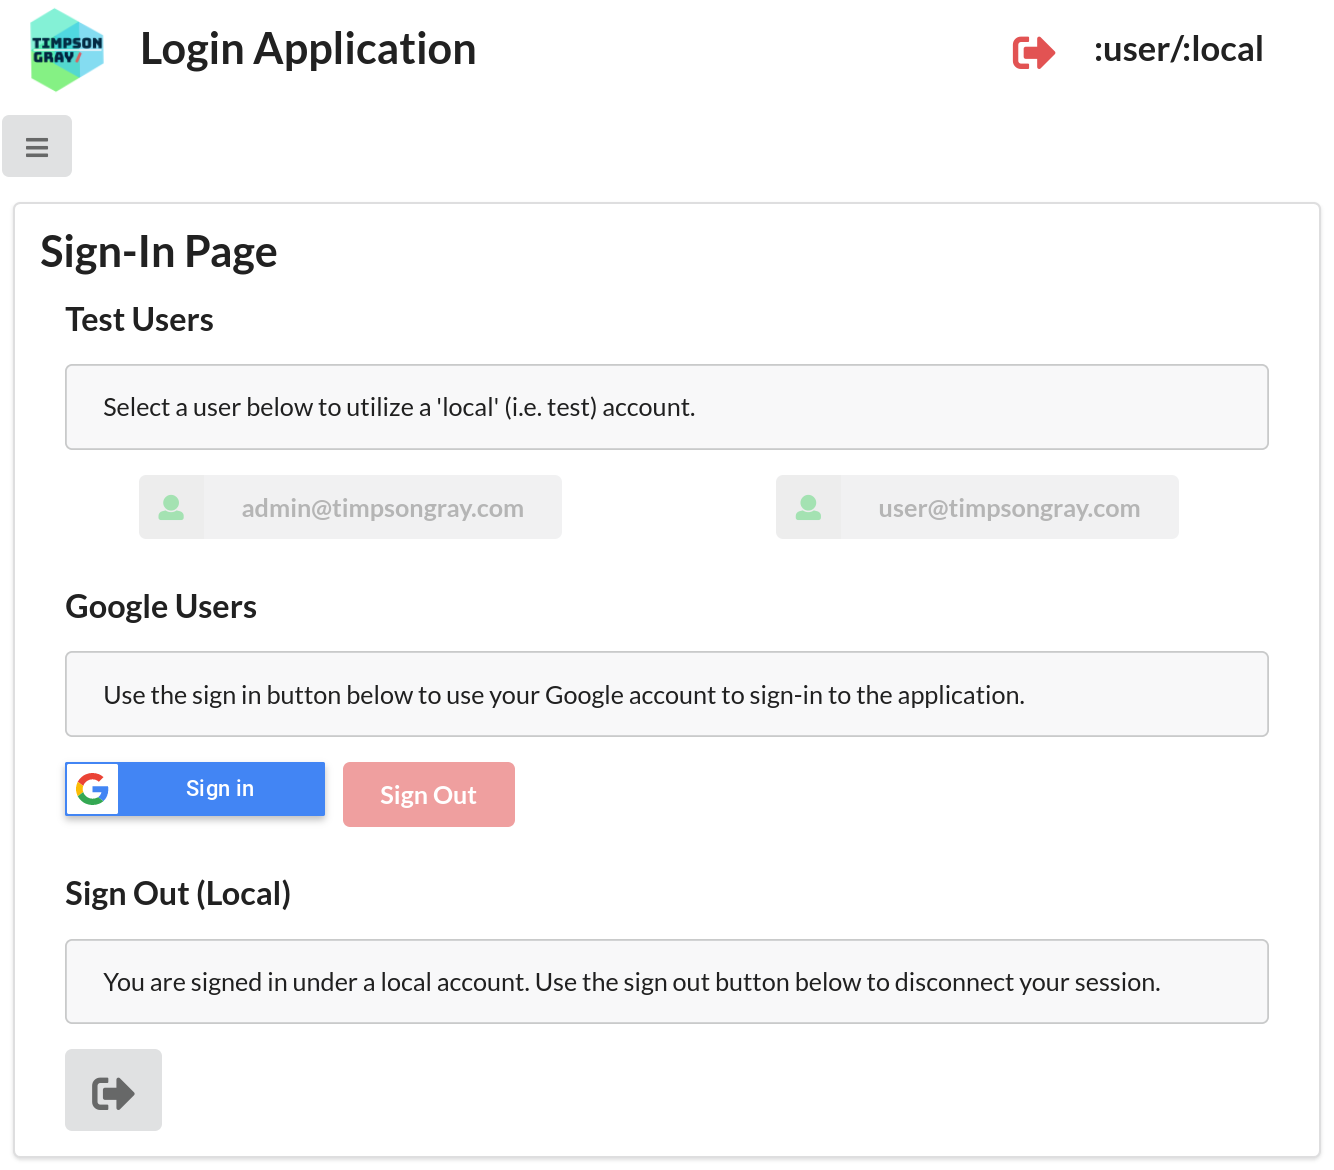
:user) is logged in.
and at the bottom click on the button in Sign-Out (Local) section. This will remove the identity information from your session, and return you to the Home page.

Sign in as a Google User
Again, click on the Users menu item to go to the Sign-In/Sign-Out page

This time however click on the Google Sign in button. This will open the familiar Google Sign-In dialog where you can login with your Google identity. If the email address of the Google user is registered with an application user ID your session will assigned that identity, but the :authority will now be :google, indicating that is the entity making the assertion of identity.
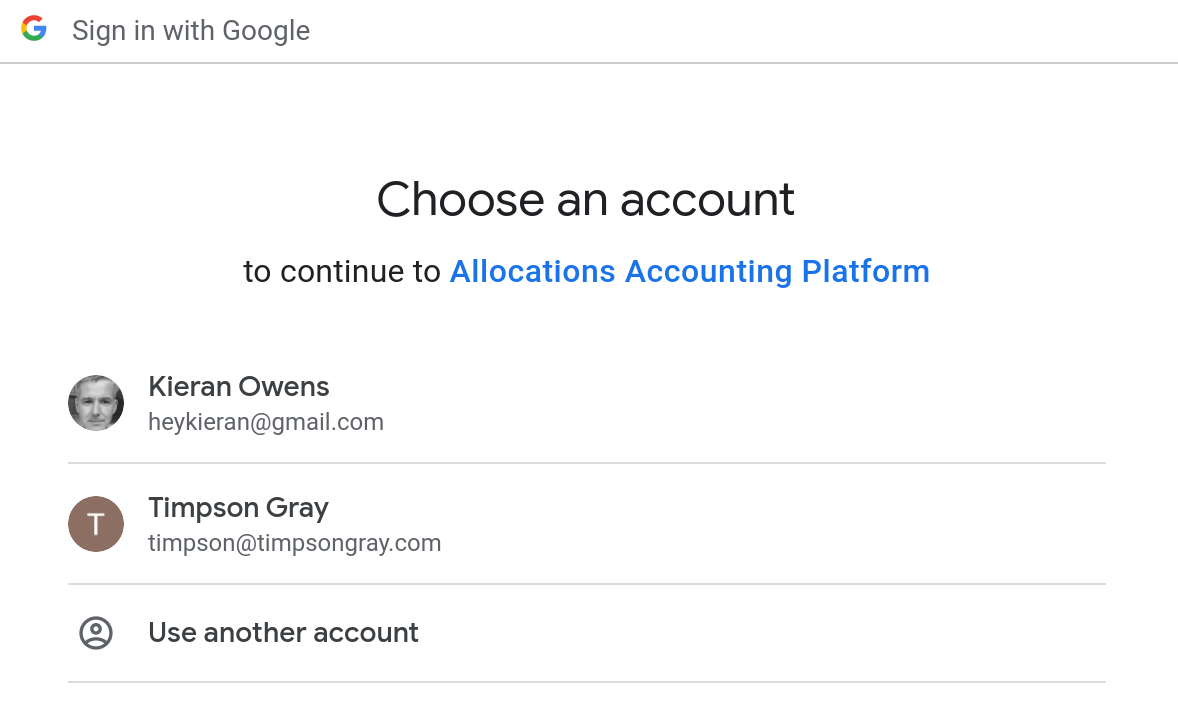
Again, you’ll be returned to the Home page where the session’s identity information is displayed.

Because
heykieran@gmail.com is an alias for the user :admin, that is the ID displayed in the top-right corner of the page, and consequently access to the API endpoints restricted to users in the :admin role will be allowed.
Signing Out
If you click on the Users menu item you can return to the Sign-In/Sign-Out page to disconnect your session from the Google account using the Sign Out button. This disconnects your application session, but does not log you out from Google.
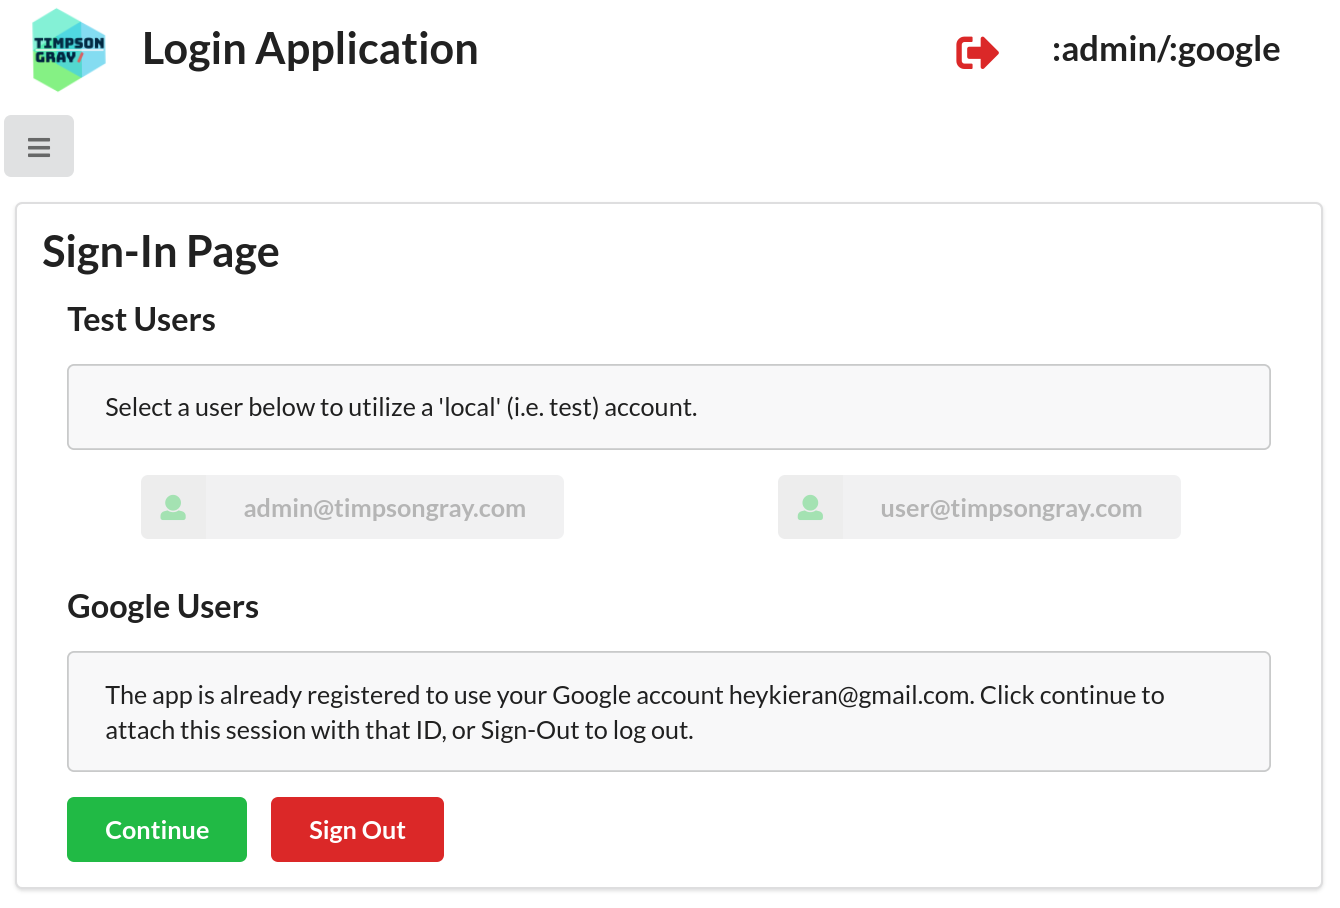
:admin).